编译选项
-arch=sm_86 是 CUDA 编译器(nvcc)中的一个编译选项,用于指定生成的代码要针对哪种 Compute Capability(计算能力) 的 GPU 架构进行编译。这里的 sm_86 表示的是 Compute Capability 8.6 的架构
import torch
print(torch.cuda.get_device_capability())
mr = load(
    name="custom_module",
    sources=["module.cpp", "kernel.cu"],
    # extra_cuda_cflags=["-arch=sm_86", "-O3", "--use_fast_math"],
    extra_cuda_cflags=["-arch=sm_86"],
    verbose=True
)
pytorch中的transpose,permute,contiguous,view,reshape
transpose
Q,K,V的形状应当是(B, N, H, d), 而我的代码处理的要求是(B, H, N, d), 可能用到V.transpose(1, 2)。注意
from flash_attn import flash_attn_func
V = V.transpose(1, 2)
flash_attn_func(Q, K, V)
transpose 操作通过 修改张量的形状(shape)和步长(stride) 来实现维度交换。每个张量在内存中都是以一维数组的形式存储的。为了访问多维张量中的元素,PyTorch 使用 步长(stride) 来确定在每个维度上移动一个单位时,需要在内存中跳过多少个元素。 假设有一个 2D 张量 A,形状为 (2, 3),步长为 (3, 1), 其数据为:
A = [[0, 1, 2],
     [3, 4, 5]]
A.transpose(0, 1) 后,张量的形状变为 (3, 2),步长变为 (1, 3)
A_transposed = [[0, 3],
                [1, 4],
                [2, 5]]
permute
将张量的维度按照指定的索引顺序重新排列,dims 的长度必须与张量的维度数一致,且每个元素是原维度的索引(从0开始)。
import torch

# 创建一个形状为 (2, 3, 4) 的三维张量
x = torch.randn(2, 3, 4)

# 使用 permute 重新排列维度:将原维度顺序 (0, 1, 2) 改为 (2, 0, 1)
y = x.permute(2, 0, 1)

print(y.shape)  # 输出: (4, 2, 3)
contiguous
非连续张量 :.contiguous() 会复制数据到新内存,并重新计算步长以匹配形状
连续张量 :无需复制,操作无影响
import torch

# 创建一个连续张量
x = torch.randn(2, 3)
print("Original (continuous):")
print(x)
print("is_contiguous:", x.is_contiguous())
print("data_ptr:", x.data_ptr())

# 调用 contiguous() 并比较
x_cont = x.contiguous()
print("\nx_cont (after contiguous):")
print(x_cont)
print("is_contiguous:", x_cont.is_contiguous())
print("data_ptr:", x_cont.data_ptr())
print("Same data_ptr as original?", x.data_ptr() == x_cont.data_ptr())  # 应为 True

# 创建一个非连续张量(通过 transpose)
y = x.transpose(0, 1)
print("\nTransposed (non-continuous):")
print(y)
print("is_contiguous:", y.is_contiguous())
print("data_ptr:", y.data_ptr())

# 调用 contiguous() 并比较
y_cont = y.contiguous()
print("\ny_cont (after contiguous):")
print(y_cont)
print("is_contiguous:", y_cont.is_contiguous())
print("data_ptr:", y_cont.data_ptr())
print("Same data_ptr as transposed?", y.data_ptr() == y_cont.data_ptr())  # 应为 False
view
view() 要求张量在内存中是连续存储的,总是共享数据
x = torch.tensor([1, 2, 3, 4])
y = x.view(2, 2)
y[0, 0] = 99
print(x)  # 输出: tensor([99, 2, 3, 4])
reshape
如果输入张量连续,reshape() 返回视图(共享数据)。对于非连续张量,reshape() 会自动调用 .contiguous(),生成新的连续内存副本。
可能共享或复制数据
x = torch.tensor([1, 2, 3, 4])
y = x.reshape(2, 2)
y[0, 0] = 99
print(x)  # 输出: tensor([99, 2, 3, 4])(共享数据)

x = torch.randn(2, 3).transpose(0, 1)  # 非连续张量
y = x.reshape(6)
y[0] = 99
print(x)  # 输出: 未改变(数据已复制)
注意
基于以上信息,当我们使用指针顺序访问张量时,要确保数据顺序存储。
half* O = (half*)(OTensor.data_ptr<at::Half>());
CUDA的异步执行?
现象1
此处数据都在cuda中,连续多次print(out)只有第一次答案是对的,其余若干次均错误且不相同。然而放到cpu中再print则不会出错。

可能与CUDA的异步执行与内存复用有关?在当调用函数时,操作被提交给GPU,但不是同步完成。out返回的是一个指向 GPU 内存的“句柄”,实际结果可能稍后才写入。
现象2
当运行 fa1 测试时,调用 C++/CUDA 扩展函数(如 mr.myFA1 或 mr.myNaiveAttention)后,C++ 中的输出(如check函数的 std::cout)可能出现在 Python 输出的任意位置 ,而非代码逻辑中的预期位置。可能的原因:
CUDA 异步执行机制
PyTorch 的 CUDA 操作默认是异步的 ,即 Python 发起的 CUDA 操作(如内核启动)会立即返回,而实际执行在后台进行。如果 C++ 代码中包含 CUDA 内核(如 kernel.cu),内核的输出(如 printf 或 std::cout)可能在 Python 代码继续执行后才触发,导致输出顺序混乱。
Python 与 C++ 输出缓冲区不同步
std::cout 和 printf 在 CUDA 设备端可能使用不同的缓冲区策略,导致输出延迟或交错。尤其是在多线程或异步执行时,输出可能不会立即刷新到控制台。
Profiler 干扰执行顺序
使用 torch.autograd.profiler.profile 会引入额外的同步和计时操作,可能影响内核的实际执行顺序,进一步加剧输出顺序的不确定性。
现象3
此处如果断言torch.allclose(res_ref, res, atol=1e-3)即使确保都在同一个设备上,也会出错。
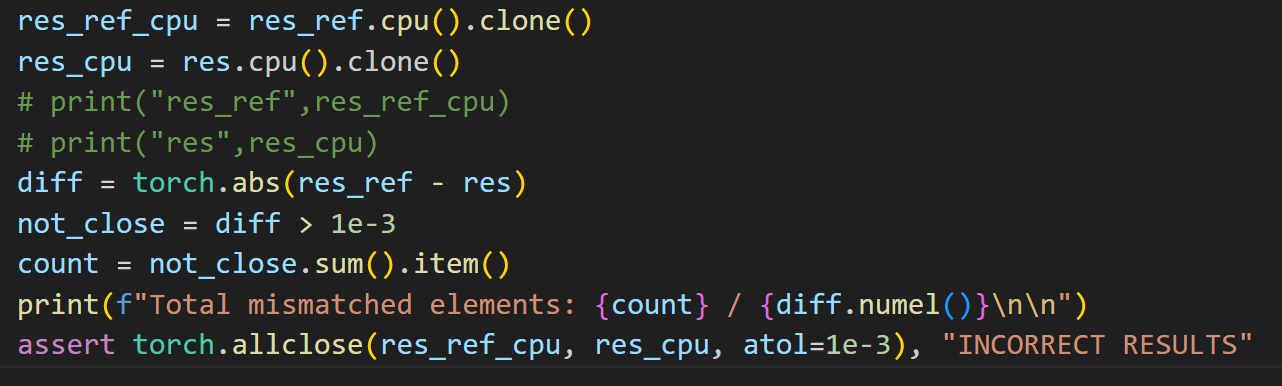
尝试捕获错误:
try:
    assert torch.allclose(res_ref, res, atol=1e-3), "INCORRECT RESULTS"
except AssertionError as e:
    print(f"Assertion failed: {e}")
    # 输出更多调试信息
    print("res_ref (GPU):", res_ref)
    print("res_ref (CPU):", res_ref_cpu)
    print("res (GPU):", res)
    print("res (CPU):", res_cpu)
    diff = torch.abs(res_ref - res)
    print("Max diff on GPU:", diff.max().item())
    print("Total mismatched elements on GPU:", (diff > 1e-3).sum().item())
发现res (GPU)错误,res (CPU)正确。和现象1的形成原因似乎一致。
res = customFunc()  # CUDA 异步操作
torch.cuda.synchronize() # 即使此处加上同步也不能成功?
assert torch.allclose(res_ref, res, atol=1e-3)  # 失败
半精度数据类型
__half
__half或half(typedef __half half): CUDA 编程中用于表示 16 位浮点数(half-precision floating-point)的原始数据类型
__global__ void kernel(__half* data) {
    int idx = threadIdx.x;
    float val = __half2float(data[idx]);
    val += 1.0f;
    data[idx] = __float2half(val);
}
at::Half
PyTorch C++ 层中用于表示 16 位浮点数的封装类型,本质上是对 __half 的封装。
在 CPU 上使用 Eigen 等库进行模拟;
在 GPU 上映射为 __half;
提供了与标准 C++ 类型(如 float)之间的转换接口
at::Tensor tensor = at::randn({2, 3}, at::kHalf);  // 创建半精度张量
float value = tensor[0][0].item<float>();  // 转换为 float
torch::kHalf
PyTorch C++ 枚举类型。
是 at::ScalarType::kHalf 的别名;
用于与 Python 层的 torch.float16 或 torch.half() 对应;
在 C++ 中常用于张量转换(如 .to(torch::kHalf))。
torch::Tensor tensor = torch::randn({2, 3}).to(torch::kHalf); // 转换为半精度
torch.float16 或 torch.half()
import torch
x = torch.randn(2, 3).half()  # 创建半精度张量
print(x.dtype)  # 输出: torch.float16
编译的问题
#include "stdio.h"
#include "cuda_runtime.h"

__global__ void kernel(void)
{
	printf(" this is from gpu\r\n");
}
int main()
{
	printf("hello world!\r\n");
	kernel <<<1, 10 >>> ();
	cudaDeviceReset();
	return 0;
}
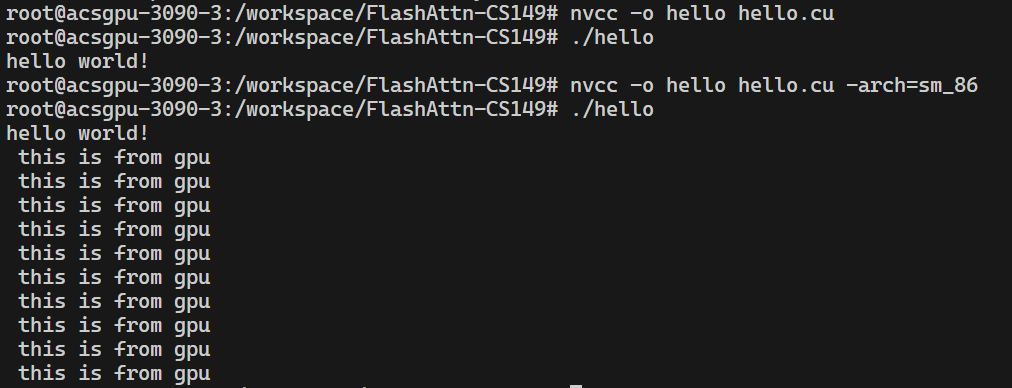
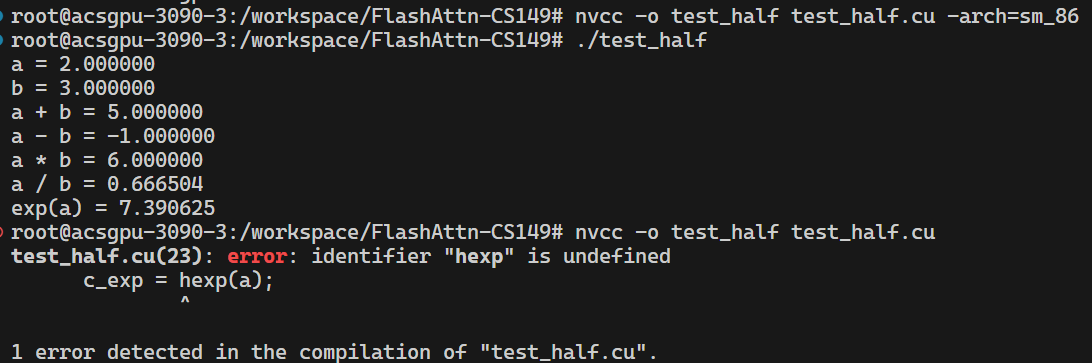
# 编译时必须带上具体的架构才能正常输出
nvcc -o hello hello.cu -arch=sm_86
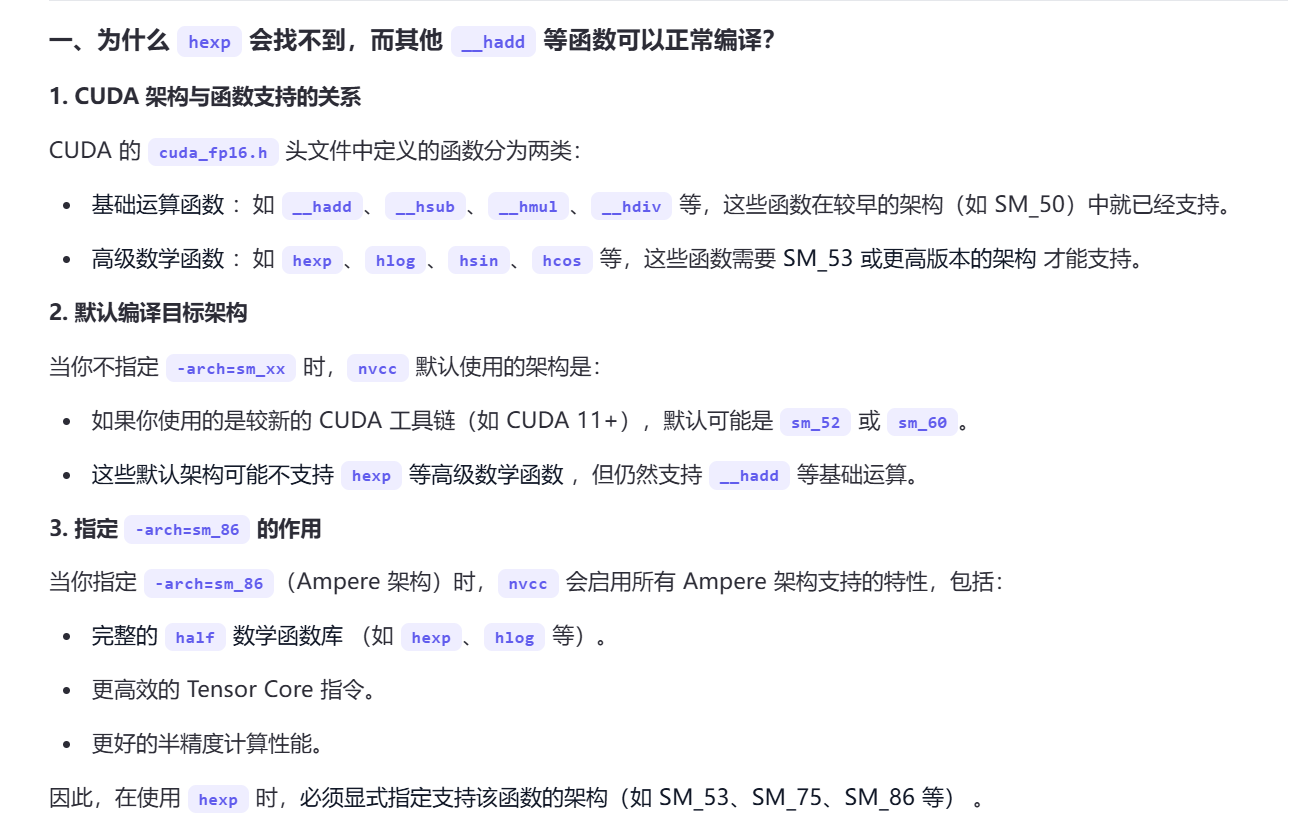
如果使用cuda_fp16.h的函数,也必须带上-arch=sm_86,否则发生错误(但是为什么是只有一部分函数找不到呢)。
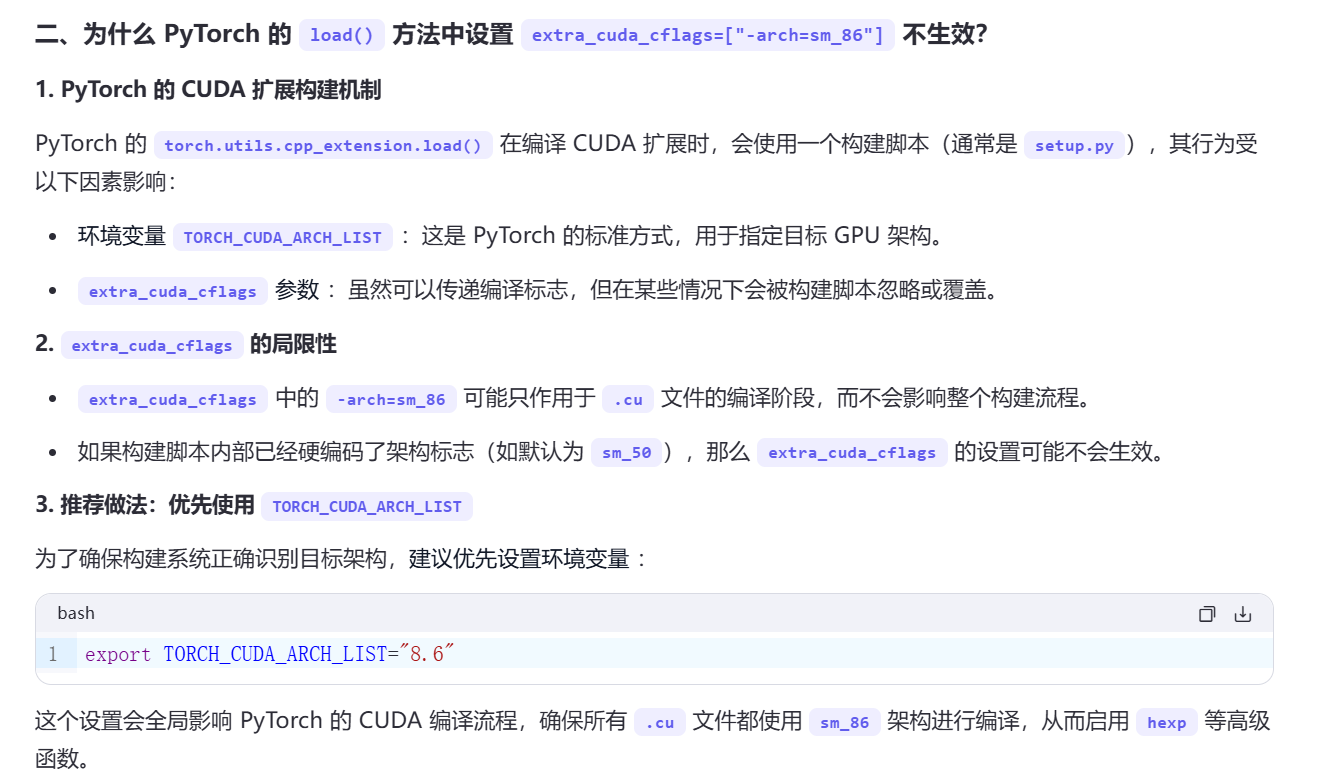
当使用在python中使用load,在C++中使用pybind11的情况下,仍然会出现编译错误,需要export TORCH_CUDA_ARCH_LIST="8.6"来指定。